Connect Meta Pixel and Conversions API to cPixel
How do I connect Meta to cPixel?
In cPixel, open Destinations, choose Meta and paste two values from Meta Events Manager: the Pixel ID, under your dataset’s Settings, and a Conversions API access token, generated further down the same tab. Choose Set up without Dataset Quality API when Meta asks. Then watch Meta’s reply to each server send in Live.
Paste them into cPixel
- In cPixel, open Destinations and click the Meta icon under Connect a platform. Set up Meta opens on Paste your IDs.
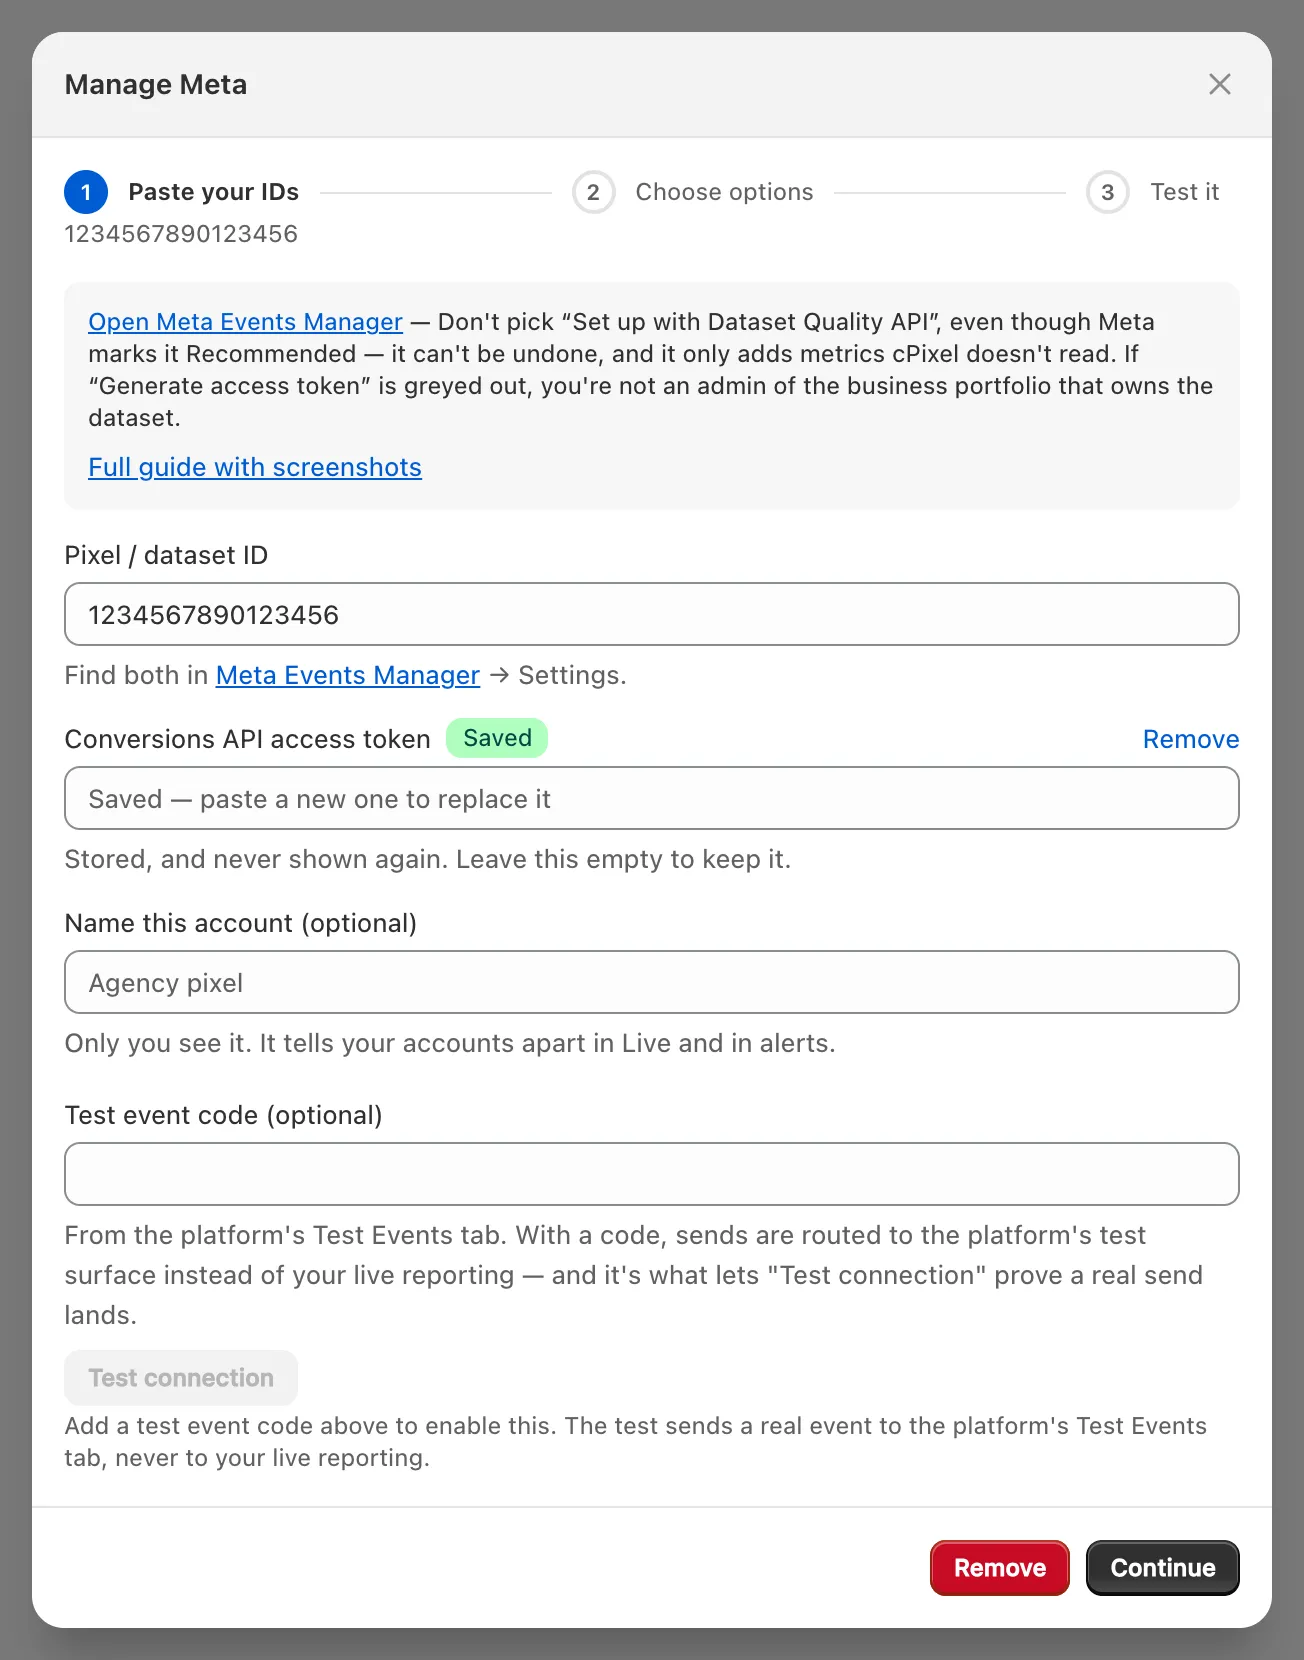
- Paste the Pixel / dataset ID (where to find it) and the Conversions API access token (how to get one). Without the token, the account is Browser only.
- Name the account under Name this account (optional) if you like, then click Continue.
- On Choose options, keep Send events from the browser and Send events from our servers ticked. Keep No — cPixel handles Meta (recommended) unless another tool sends to this dataset: despite its label, Yes — keep it, and cPixel stops sending Meta server-side stops cPixel’s browser and server sends to it (one sender per pixel). Advanced settings is optional (order rules).
- Click Save and continue. Test it confirms Meta is connected.
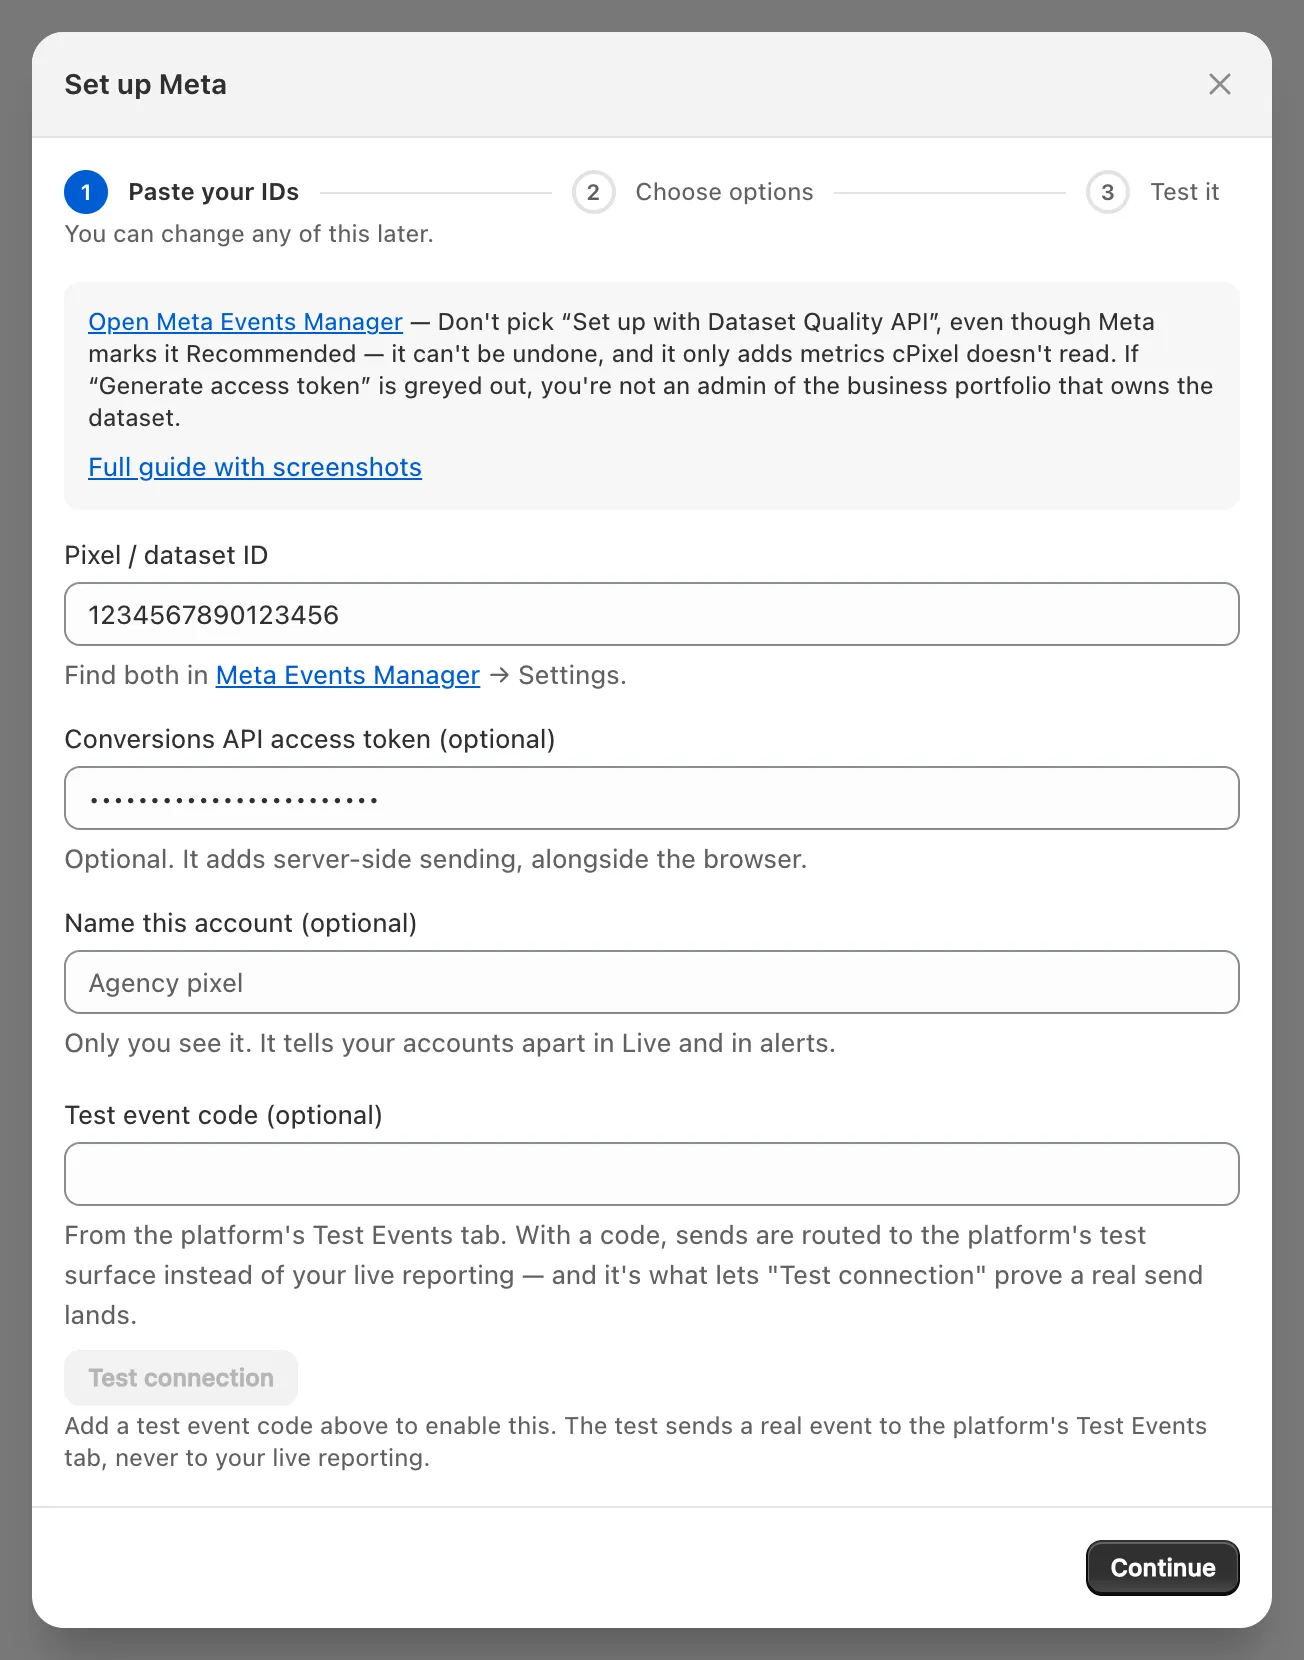
You can connect several Meta pixels, which share cPixel’s event IDs, but not the same one twice.
Where do I find my Meta Pixel ID?
In Meta Events Manager, select your store’s web dataset and open Settings: the Pixel ID there, about 15 digits, goes in cPixel’s Pixel / dataset ID field. Meta calls it a dataset ID almost everywhere else.
Find your dataset. A web dataset, the kind a Shopify store uses, has a monitor icon; a phone icon means an app dataset.
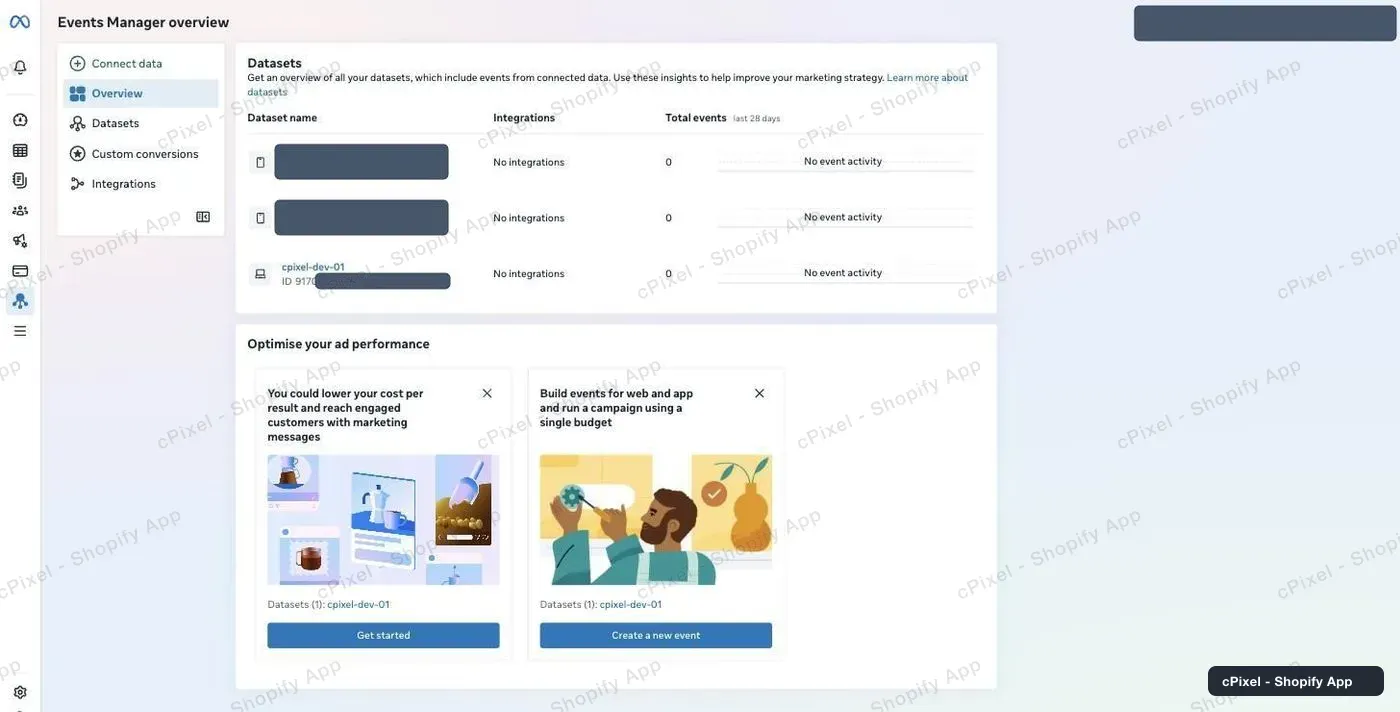
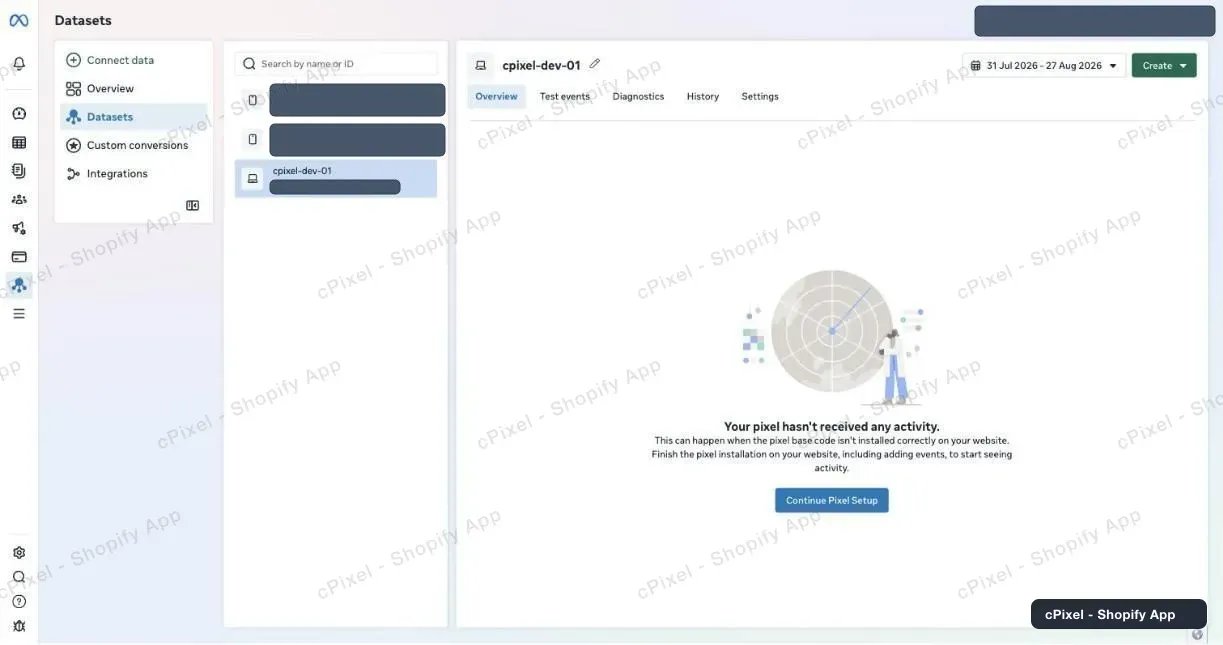
Select it. A new dataset shows Your pixel hasn’t received any activity until events arrive.
Open Settings and copy the number under Details → Pixel ID.
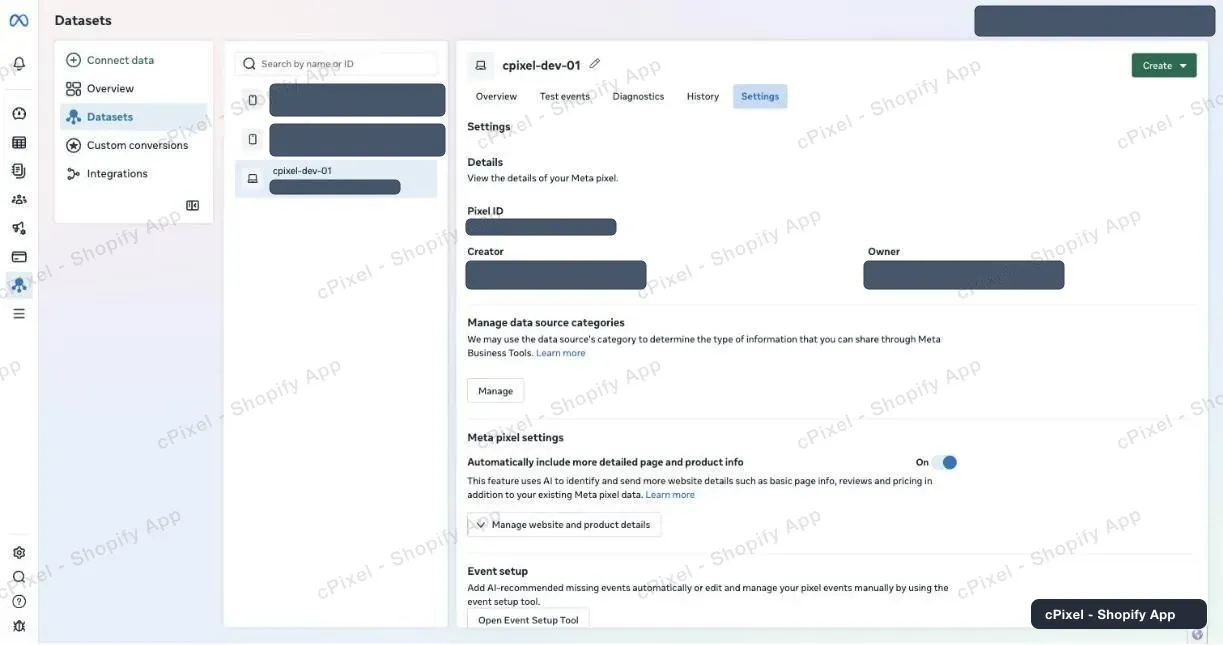
Tip: Two datasets can share a name. If only one of them can generate a token, they’re different datasets: check the ID.
How do I get a Conversions API access token?
On the same Settings tab, under Conversions API, choose Set up without Dataset Quality API and click Generate access token. Tick this store’s dataset and copy the token, a long string beginning EAA, at once: Meta shows it once and doesn’t store it.
Scroll Settings down to Conversions API. The screenshot below, like Meta’s own, shows the options under Set up direct integration; Meta’s guide text says Set up manually. Use whichever your account shows.
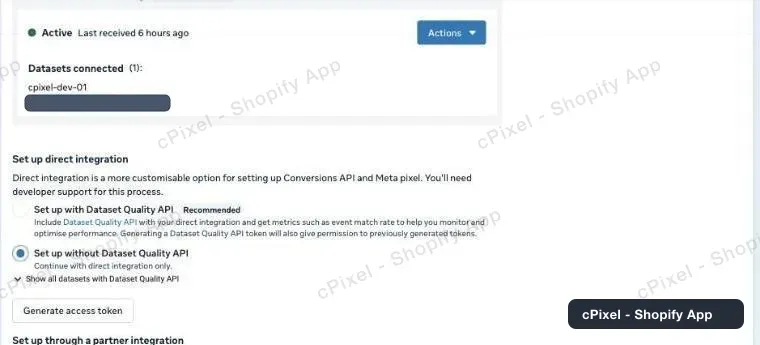
- Choose Set up without Dataset Quality API (why).
- Click Generate access token and tick this store’s dataset.
Copy the token before you close the panel. Meta’s note is literal: Copy and save this token somewhere safe. It won’t be stored by Facebook.
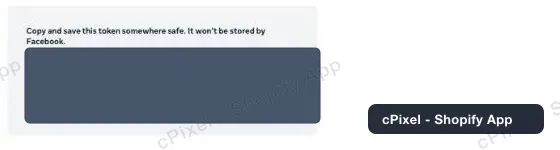
- Paste it into cPixel’s Conversions API access token field.
Important: A greyed-out Generate access token (hover: Missing prerequisite) means you’re not an admin or developer of the business portfolio that owns the dataset (Meta); a dataset made under a personal ad account does this. Ask a portfolio admin, or add the dataset to the portfolio under Data sources in Meta Business Suite’s Settings.
A token works only for the datasets you ticked. Meta doesn’t say how long a token from Events Manager lasts, and it stops working if its system user loses access to the dataset, which Meta reports as a permission error.
Should I set up the Dataset Quality API?
No. cPixel doesn’t need it, and Meta’s dialog warns that once a dataset uses the Quality API you can’t currently opt out. Meta marks it Recommended and says it adds metrics such as event match rate; a token made without it sends the same events.
Without it, cPixel’s Event quality page may say This token type can’t read Meta’s score, the one thing the Quality API would add there. Sending is unaffected.
What does cPixel send to Meta?
PageView, ViewContent, Search, AddToCart, InitiateCheckout and AddPaymentInfo go from both the shopper’s browser and cPixel’s servers, sharing one event ID. The Purchase goes from the servers, rebuilt from the Shopify order. There’s no deduplication setting to configure.
- The browser Purchase is switched off while cPixel’s server sending to that pixel is active. It fires only while that sending is off or paused: no token or a rejected one, the server switch off, or the Free plan’s pause.
- The browser leg runs in Shopify’s web pixel on every page, checkout included, so it doesn’t need the app embed.
- Server sends carry hashed email, phone, customer and device IDs,
_fbpand_fbc, IP address and user agent, and by default a hashed location guessed from the IP. Meta needs marketing consent: see what cPixel sends, and how consent changes it.
Should I use a test event code?
Only if you want Test connection. cPixel uses the code for that test and for a nightly check of an account with no successful send for 7 days, never for real events, whatever the wizard’s note says. The test sends one real PageView, which Meta keeps for targeting and measurement.
- Copy the code, which starts with
TEST, from your dataset’s Test events tab into Test event code (optional), then click Test connection: Working means Meta accepted the test event. - Real events carry no code, so your purchases won’t appear on Test events; check the dataset’s Overview.
How do I check it worked?
Start a session in Live and browse your store: each Meta server send shows Meta’s reply, Accepted, Rejected or Error, with the HTTP status. Then confirm in Events Manager, where Meta says you should see events within 20 minutes.
- In cPixel, open Live and click Start session.
- In another tab, view a product and add it to the cart.
- Open a Server row: under Sent to, Meta reads Accepted. Browser rows carry no reply.
On Destinations, the account now shows Verified.

- In Events Manager, the dataset’s Overview shows Conversions API as the Purchase’s integration and Multiple, meaning browser and server, for the other events.
To see a purchase, place a real order: cPixel skips test orders by default.
What if it doesn’t work?
If Meta rejects the access token as invalid or expired, cPixel marks the account Token invalid, stops its server sends and emails a critical alert to your store’s contact address; Home shows Fix Meta. Browser tracking carries on.
- Click Fix Meta on Home, or Manage beside the account on Destinations.
- Generate a new token and paste it over Saved — paste a new one to replace it.
- Click Continue, then Save and continue.
| What you see | What to do |
|---|---|
| Generate access token is greyed out | Get admin or developer access to the dataset’s business portfolio |
| Test connection: the platform rejected this token | Generate a new token |
| Test connection: the platform refused the test event for this account | The ID is wrong, or the token belongs to another dataset |
| Meta rejected an event on Home, citing permissions | Restore the system user’s access, or generate a new token |
| A purchase shows Skipped in Live | Read its reason, then see purchases not showing |
| Purchases counted twice | Another tool sends to this dataset: one sender per pixel |
Remove in Manage Meta stops sends and deletes the stored token; you can reconnect with the same ID. Meta’s own guide: Conversions API: get started.
