Get Started with cPixel
How do I set up cPixel?
Install cPixel from the Shopify App Store and it opens on Set up cPixel, four steps: turn on the app embed, connect your first platform, choose your plan, and watch your first events arrive. The last step opens Live with a session already running, so you see real events go out before you leave setup.
Until you finish or skip it, every page opens on setup and the menu shows only Set up cPixel.
- Turn on the app embed: Open theme editor opens your published theme on App embeds with cPixel tracking switched on. Click Save there; the step ticks itself off. Only this step has Skip this step.
- Connect your first platform: Choose a platform lists all seven, though the text names four.
- Choose your plan: Start free, or pick a paid plan (Choose Starter, say) and approve it on Shopify’s screen (compare plans).
- Watch your first events arrive: Start watching finishes setup and opens Live with a session running, which on the Free plan uses one of your Live sessions.
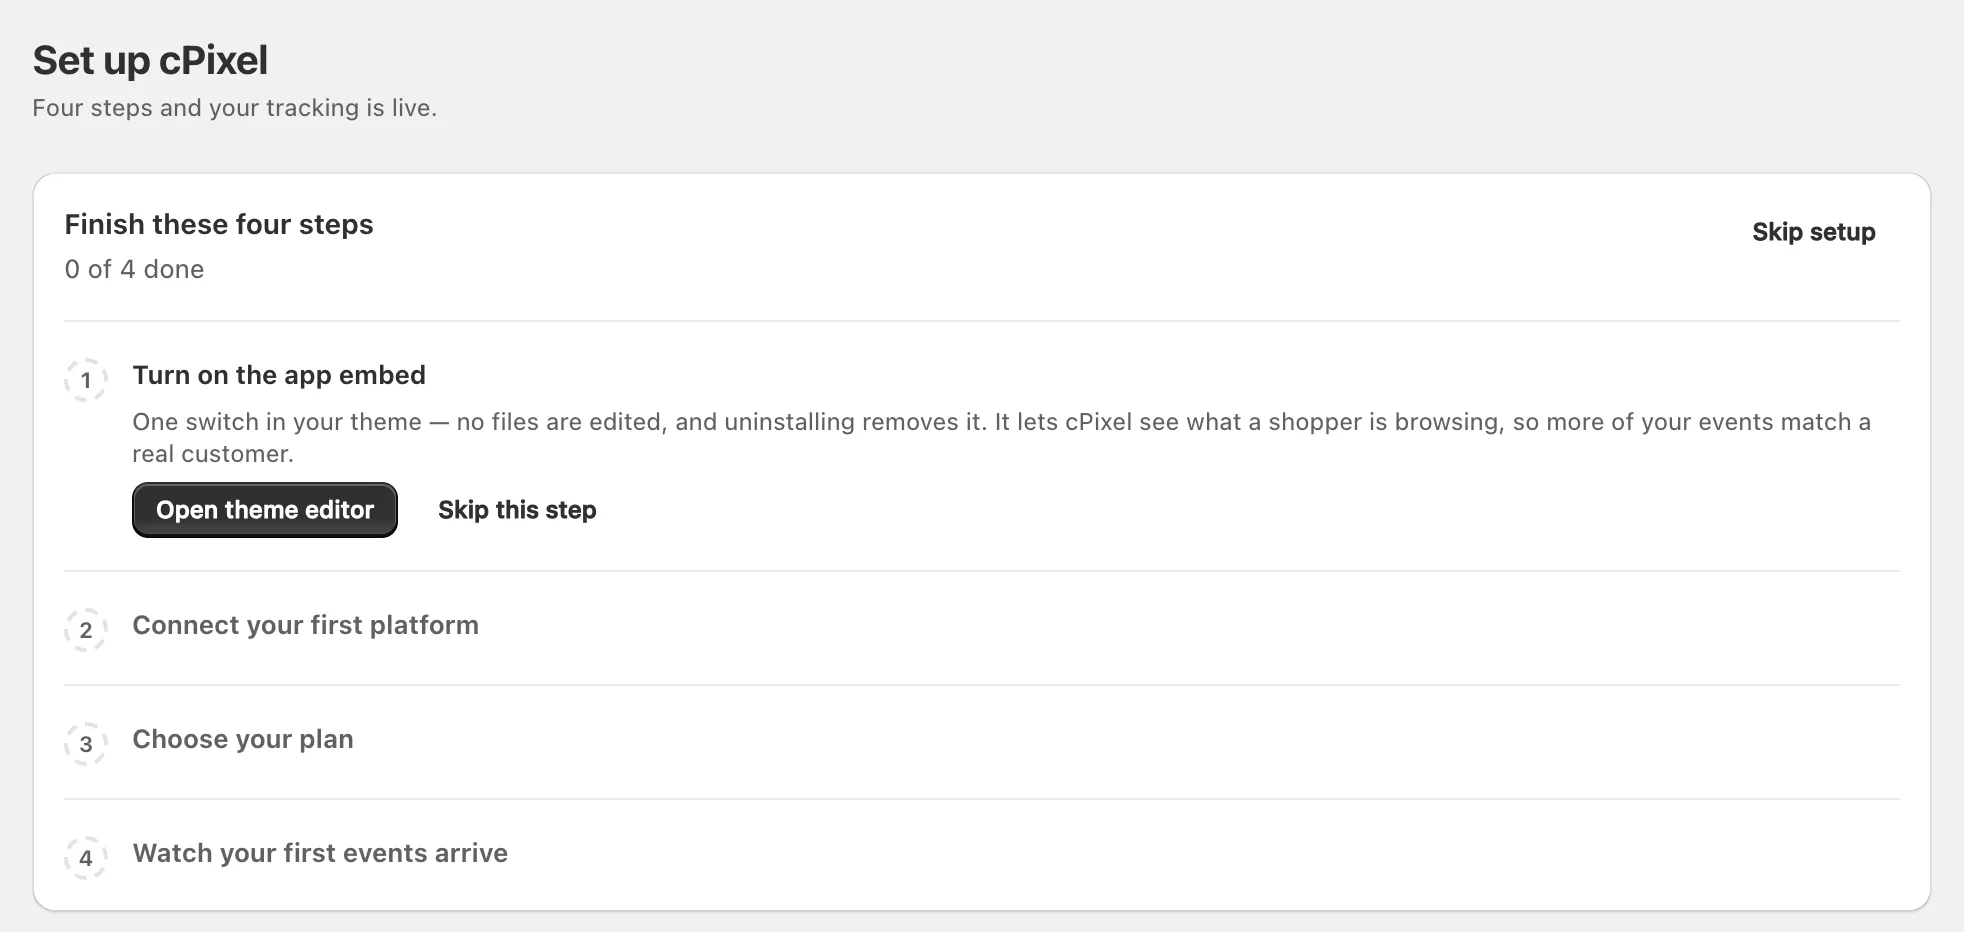
Skip setup goes to Home, where Finish setup brings you back. The side panel Two ways cPixel tracks explains the two legs.
Note: Nothing is registered in your store until you save a platform; then the pixel cPixel appears under Settings → Customer events.
Which platforms does cPixel send to, and from where?
cPixel sends to seven platforms. Six also get events from its servers, which build each purchase from the Shopify order, not the Thank you page; Google Ads gets a browser tag only. Browser legs run in Shopify’s web pixel, on every page including checkout, or in storefront tags the app embed loads.
| Platform | Browser leg | Server-side events | Purchase from | What you paste |
|---|---|---|---|---|
| Meta | Web pixel, every page | PageView, ViewContent, Search, AddToCart, InitiateCheckout, AddPaymentInfo, Purchase | Server; browser as fallback | Pixel / dataset ID; Conversions API access token (optional) |
| TikTok | App embed: Pageview | Pageview, ViewContent, Search, AddToCart, InitiateCheckout, AddPaymentInfo, CompletePayment | Server | Pixel code, Events API access token |
| Google Analytics 4 | Web pixel, every page | purchase, refund | Server | Measurement ID; Measurement Protocol API secret (optional; needed for purchases) |
| OpenAI Ads | App embed: page views, product views, add-to-carts | checkout_started, order_created | Server | Pixel ID, Conversions API key |
| Snapchat | App embed: page views, add-to-carts | START_CHECKOUT, ADD_BILLING, PURCHASE | Server | Snap Pixel ID, Conversions API access token |
| App embed: page visits, add-to-carts | initiate_checkout, checkout | Server | Tag ID, Ad account ID, Conversions API access token | |
| Google Ads | Web pixel, Thank you page only | Nothing | Browser | Conversion ID, Conversion label |
- Every plan sends server-side; only the Free plan pauses, at its monthly order allowance, and not in its first days after install (pricing). Browser tracking is never metered.
- If a GA4, OpenAI Ads, Snapchat or Pinterest browser event never leaves the device, cPixel sends it from its servers.
- Snapchat’s and Pinterest’s server sends are new: in production since September 2026, and not yet confirmed on a live ad account.
- Refunds reach GA4 only. Microsoft Advertising and X aren’t offered.
Why does cPixel need its app embed?
The app embed, cPixel tracking, loads the storefront tags for TikTok, OpenAI Ads, Snapchat and Pinterest and lets cPixel see what shoppers browse, so more of your events can be matched to a customer.
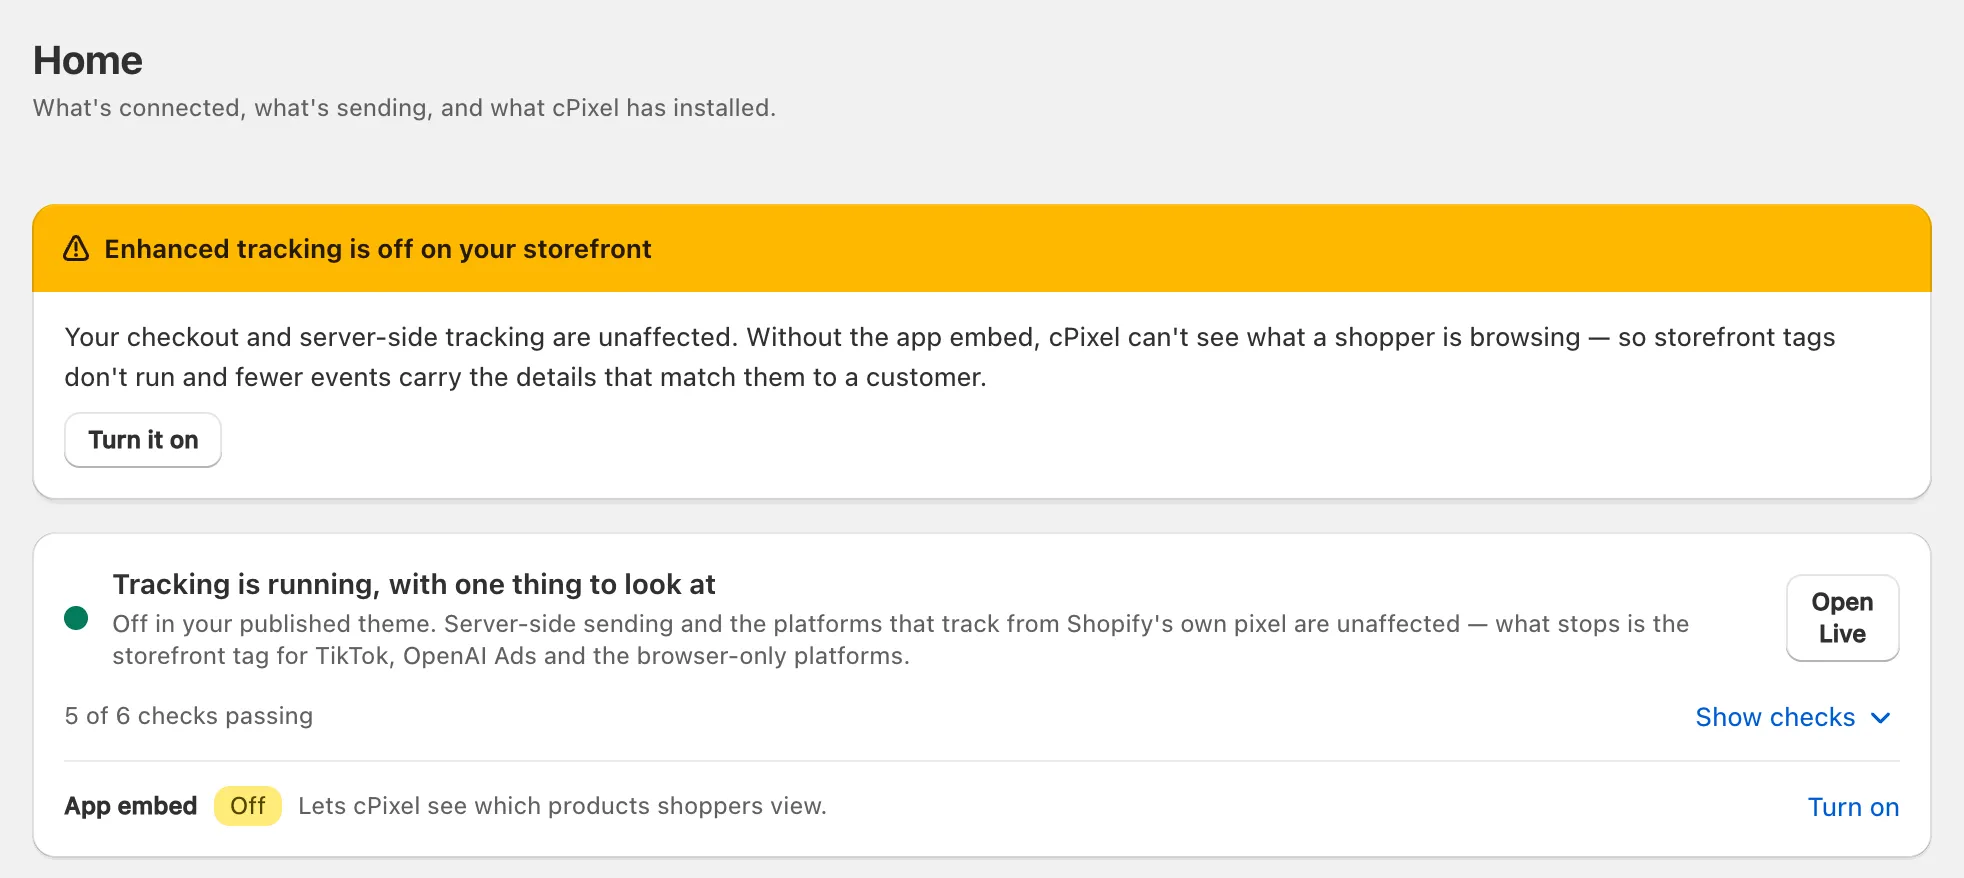
With it off, checkout, purchases, every server leg and the Meta, GA4 and Google Ads browser events carry on. What stops: those four storefront tags, TikTok’s pairing of browser and server page views, OpenAI’s click cookie, and storefront targeting by collection or tag. Home shows Enhanced tracking is off on your storefront.
Turn on the app embed
- On Home, click Turn it on, or Turn on beside App embed. Your theme editor opens with cPixel tracking switched on under App embeds (Shopify’s guide).
- Click Save, then return to cPixel: App embed reads On.
Important: App embeds belong to one theme. After publishing another theme, switch cPixel tracking on there too; cPixel warns you if you forget.
How do I connect my first platform?
Open Destinations, pick a platform under Connect a platform and follow the wizard: Paste your IDs, Choose options and Test it. Each platform’s guide shows where its values live, starting with connect Meta and connect OpenAI Ads.
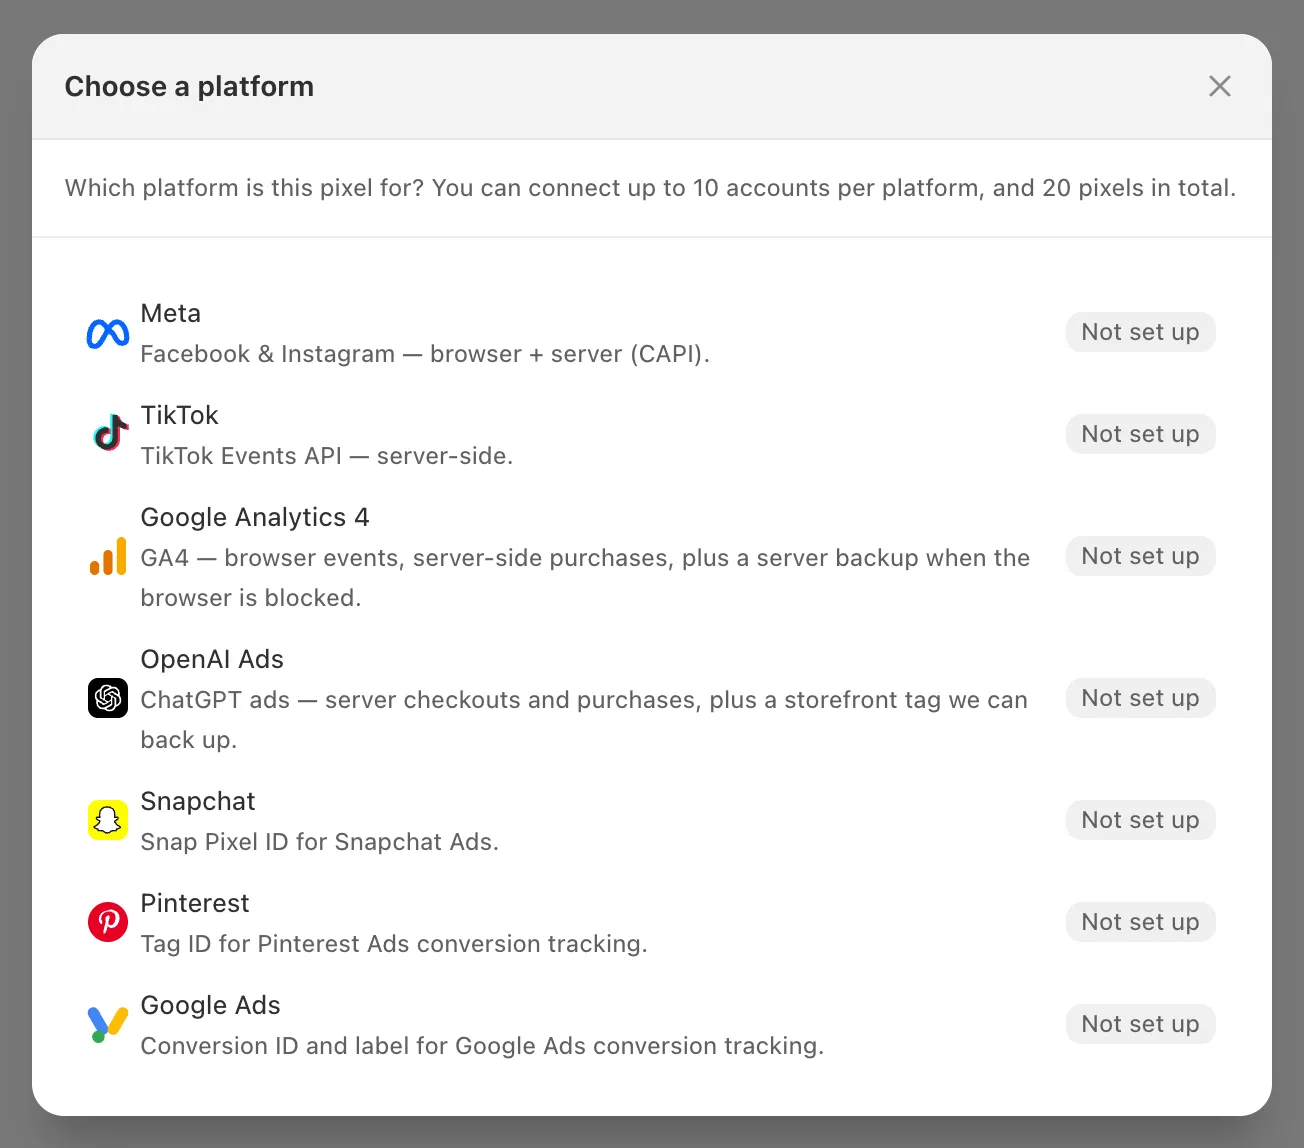
You needn’t finish a platform in one sitting: Meta and GA4 accept the ID alone, as Browser only, until you add the token or secret. TikTok, OpenAI Ads, Snapchat and Pinterest need their token from the start.
How do I know events are arriving?
Open Live, click Start session and browse your store in another tab. For 10 minutes, events appear as they’re sent, and server sends show the platform’s reply: watch your first events in Live.
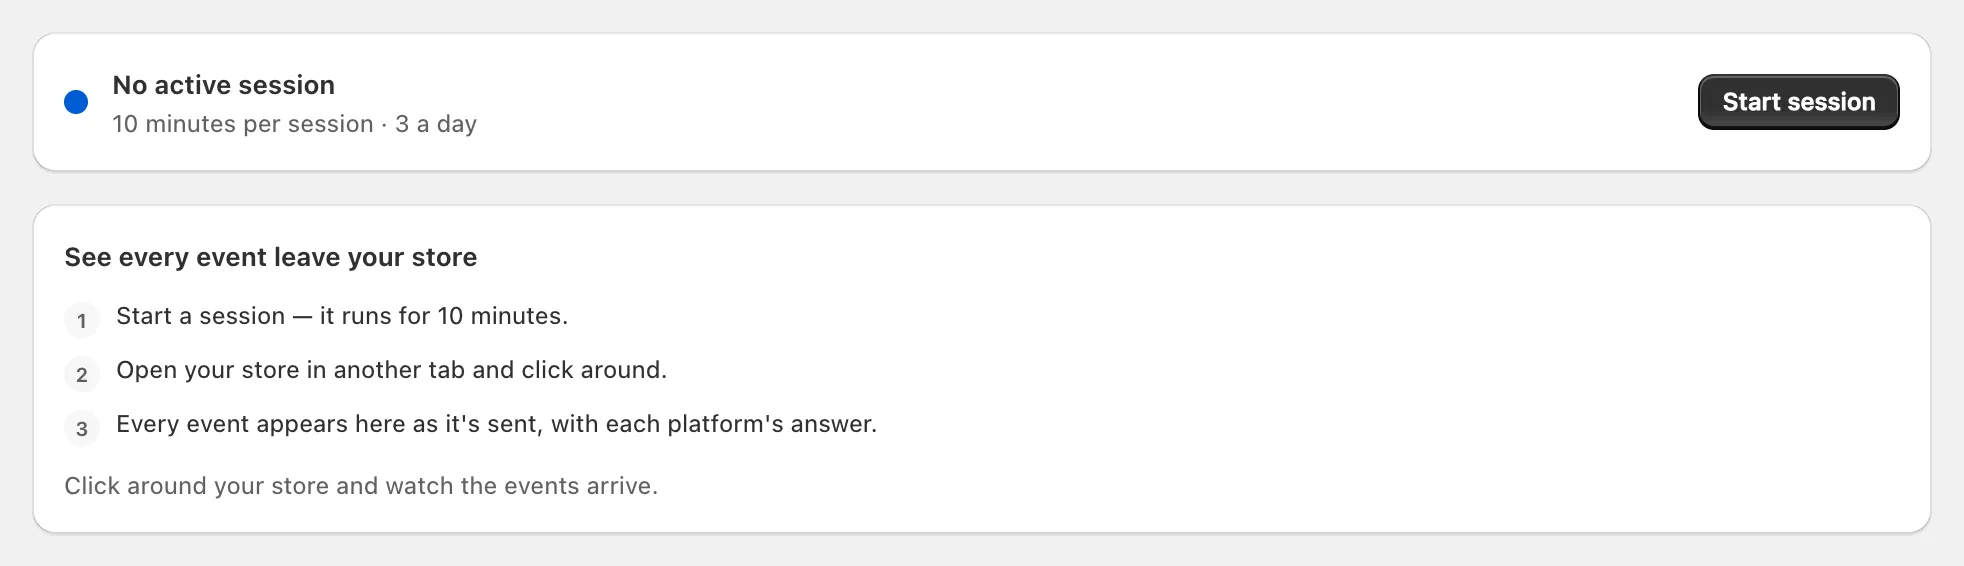
On Destinations, Verified means a server send has succeeded, Credentials OK a passing Test connection, and Browser only an ID without a token. Show checks on Home lists six health checks. Each connect guide shows where to check in the platform.
Tip: cPixel skips test orders by default, every order on a development store included, and Live marks them Skipped; to see a purchase, pay for real or untick Settings → Test orders.
What should I set up next?
Connect your other platforms. You can keep the Facebook and Instagram app and other platforms’ own apps for their catalogues and shops, with one sender per pixel.
- If a purchase goes missing, see purchases not showing; for allowances, cPixel plans; for cash on delivery, order rules.
- For help: Home → Get help → Contact support, usually answered within one business day.
Removing cPixel
cPixel edits no theme files and can’t add script tags, so nothing needs cleaning up by hand.
- On a paid plan, cancel first under Plan → Cancel plan, which is prorated; uninstalling can still bill the current cycle.
- In Shopify, go to Settings → Apps, click … beside cPixel, then Uninstall. Shopify removes cPixel’s pixel and app embed automatically.
cPixel deletes your access tokens at once and everything else about 48 hours later; reinstall sooner and your settings return, without the tokens.
