Connect TikTok Pixel and Events API to cPixel
How do I connect TikTok to cPixel?
Open TikTok Events Manager from the Ads Manager account for your store, copy the Pixel ID from Datasets overview, then open the dataset’s Settings, Data connection, and scroll past both TikTok Pixel options to Events API to generate an access token. Paste both into cPixel; without the token, cPixel sends TikTok nothing.
Paste them into cPixel
- In cPixel, open Destinations and click the TikTok icon under Connect a platform. Set up TikTok opens on Paste your IDs.
- Paste the Pixel ID into Pixel code and the token into Events API access token, which is required: TikTok’s pixel can’t run in Shopify’s web-pixel sandbox. Name the account under Name this account (optional) if you like, then click Continue.
- On Choose options, keep Send events from our servers ticked; Send events from the browser adds TikTok’s storefront tag, which needs the cPixel app embed. Keep No — cPixel handles TikTok (recommended) unless Shopify’s TikTok app sends to this pixel: despite its label, Yes — keep it, and cPixel stops sending TikTok server-side stops cPixel’s browser and server sends to it.
- Click Save and continue. Test it confirms TikTok is connected.
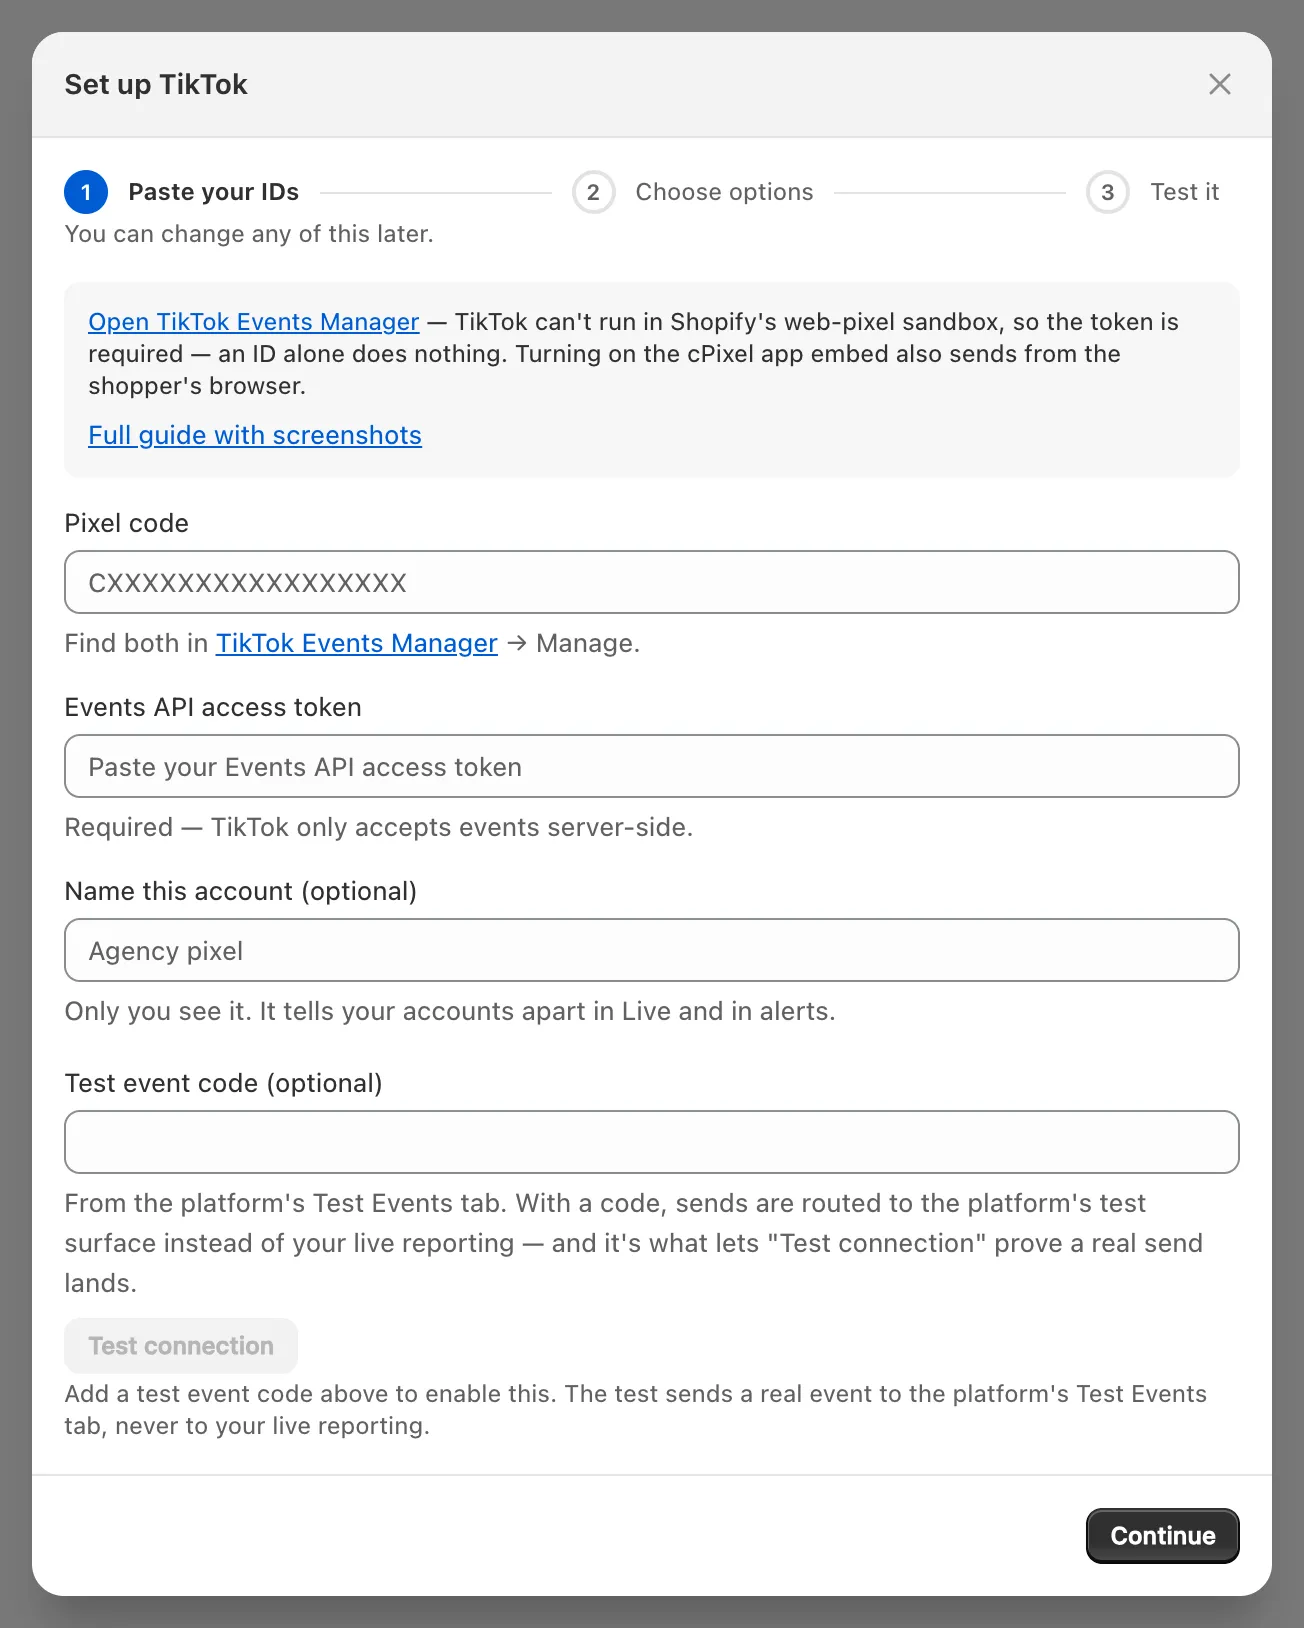
Note: Test event code (optional) serves only Test connection, which sends one real test event to your pixel’s Test Events tab (copy the code, starting
TEST, from there), and cPixel’s nightly check of an account idle for 7 days. Whatever the field’s help says, real events never carry it.
Where do I find my TikTok Pixel ID?
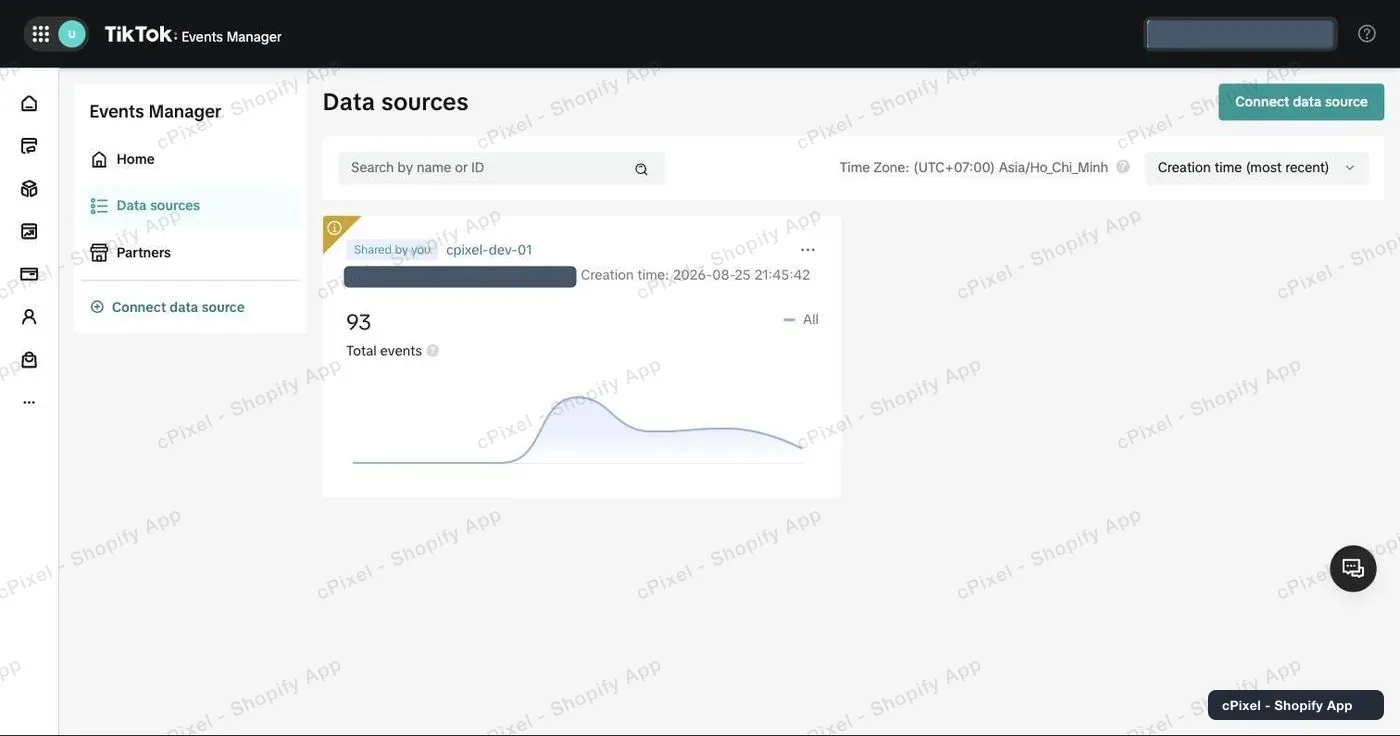
In TikTok Events Manager, printed under each dataset’s name: 20 letters and digits. Use TikTok’s menus: a typed Events Manager address often ends on “Page not found”.
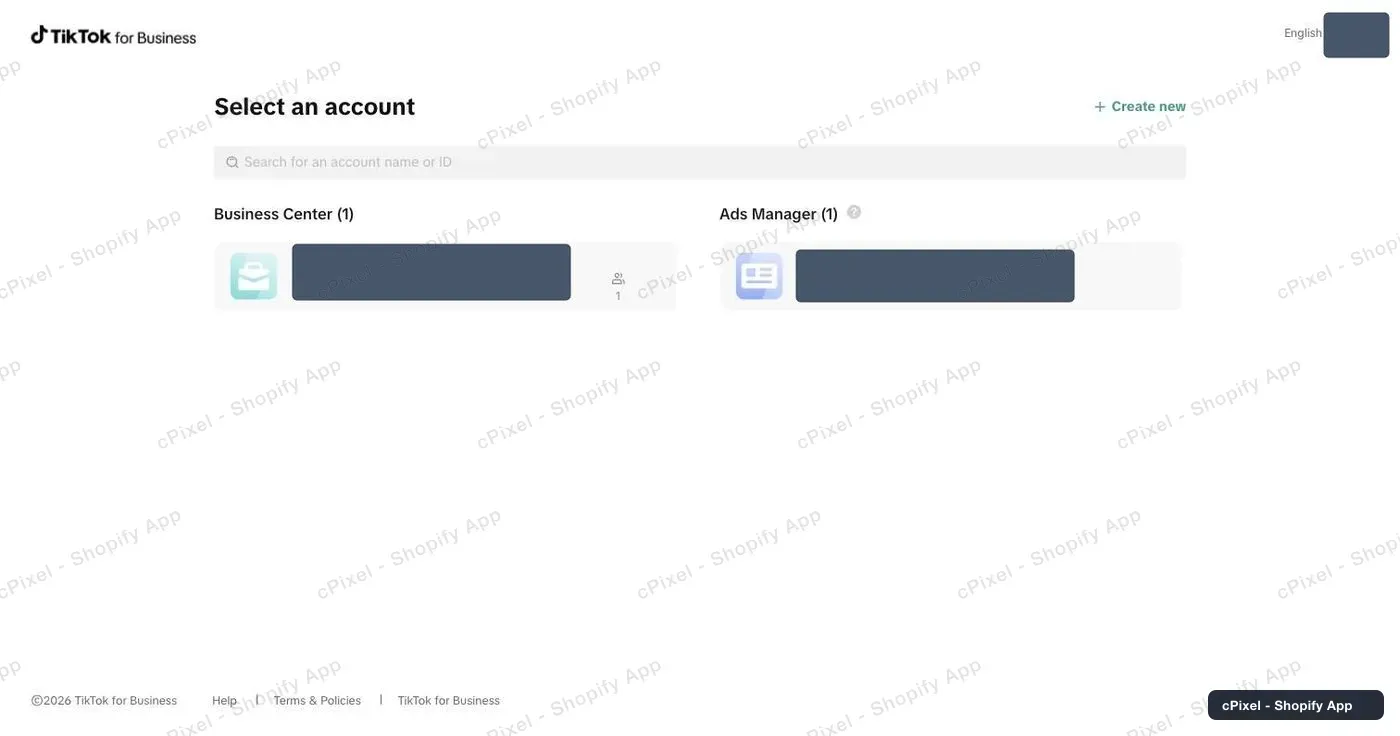
Sign in to TikTok Ads Manager. On Select an account, pick the Ads Manager account for this store, not the Business Center that owns it.
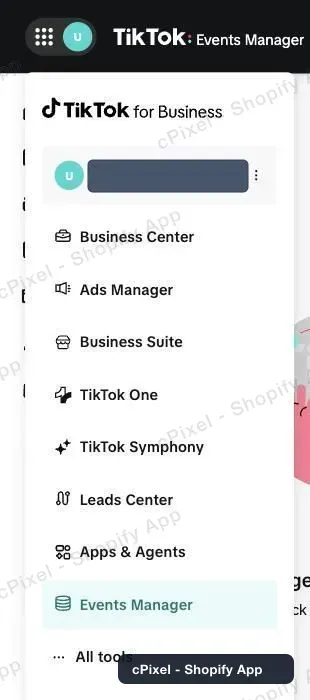
Open the grid icon at the top left and choose Events Manager.
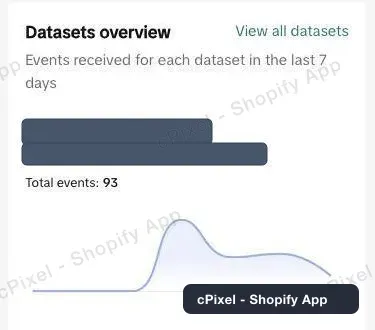
On the Events Manager home page, Datasets overview shows the Pixel ID under each dataset name.
Data sources in the left menu lists every dataset with its Pixel ID and creation time.
How do I get an Events API access token?
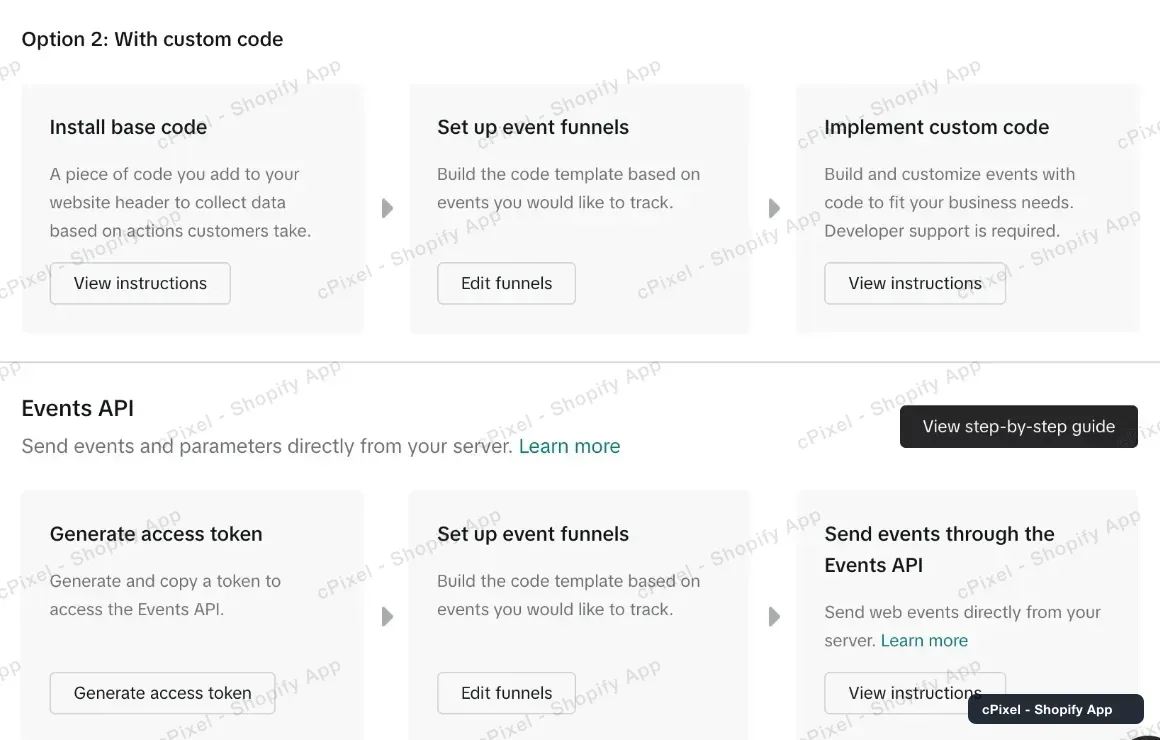
Generate it in your dataset’s settings, in the Events API block below the TikTok Pixel options. TikTok’s own guide: Get started with Events API.
- Click your dataset, then open Settings → Data connection.
- Scroll past Partner integration and both TikTok Pixel options, Option 1: With Event Builder and Option 2: With custom code, to Events API.
- Click Generate access token and copy the long token into cPixel.
Why can’t I find the Events API section?
Usually it’s further down than it looks: keep scrolling. If it’s really missing, you lack the rights to manage the pixel.
TikTok Pixel’s two options fill the screen, so the page seems to end early. With no block at the very bottom, you lack TikTok’s required Admin or Operator access to the ad account; if a Business Center owns the pixel, ask its admin to share it with you with permission to manage it.
What does cPixel send to TikTok?
cPixel’s servers send everything through the Events API: Pageview, ViewContent, Search, AddToCart, InitiateCheckout, AddPaymentInfo, and CompletePayment, the purchase built from the Shopify order. With the app embed on, TikTok’s storefront tag also sends each Pageview from the browser, under the server copy’s event ID.
CompletePayment is TikTok’s former name for Purchase; TikTok still accepts it and reports Purchase (TikTok).
Server events carry hashed email and phone when known, hashed Shopify customer and device IDs, TikTok’s _ttp cookie and ttclid click ID, and IP address and user agent. Both legs need marketing consent. An ad blocker that stops cPixel’s own request from the browser stops the browsing events; purchases come from Shopify’s order.
TikTok keeps the first event with the same pixel, event and event ID, drops repeats for 48 hours, and tries to merge one arriving within 5 minutes (TikTok).
Important: Shopify’s TikTok app also sends to its pixel, adding the Events API at its Enhanced and Maximum data-sharing levels (TikTok). Its event IDs differ from cPixel’s, so keep one sender per pixel.
How do I check it worked?
Watch each send and TikTok’s answer in cPixel’s Live, then check TikTok Events Manager.
- In cPixel, open Live, click Start session and browse your store in another tab. Open a Server row: Accepted means TikTok returned code 0, its success code (TikTok).
- Place a real order to see the purchase; test orders are skipped by default.
- In Events Manager, open your pixel’s Overview: cPixel’s events show the connection method Server, and page views Server & Browser with the storefront tag on (TikTok). Counts can take up to 10 minutes to update, and processing up to 2 hours (TikTok).
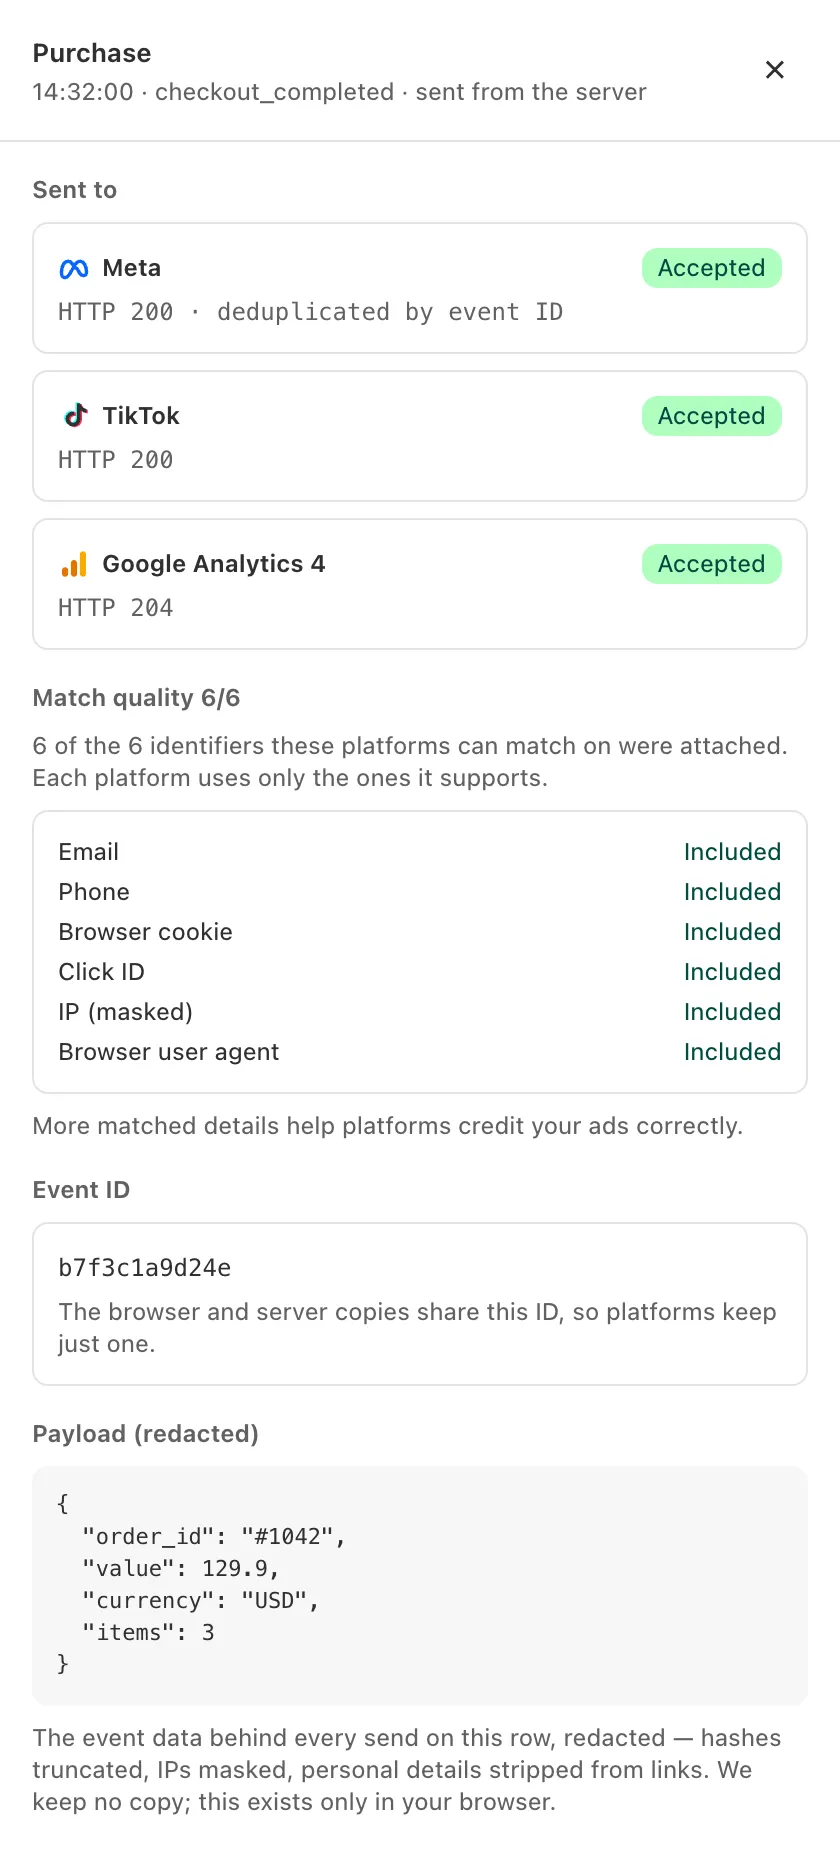
Destinations marks the account Verified after its first successful server send. Test Events shows only Test connection’s event, never real traffic.
What if it doesn’t work?
If TikTok isn’t receiving cPixel’s events, check Home, then the TikTok row in Live, which shows TikTok’s code and message.
| What you see | What it means | What to do |
|---|---|---|
| Rejected with a token or permission error; Home says the account needs attention | TikTok refused the token: revoked, or from another ad account (code 40001 means no permission). cPixel pauses server sends to it and emails your store’s contact address | Generate a new token in this pixel’s Settings. Click Fix TikTok on Home, or Manage beside the account on Destinations, paste it, then Continue and Save and continue |
| Rejected with code 40002, invalid payload | TikTok refused one event; later ones still go | If it repeats, Home → Get help → Contact support |
| Skipped, with a reason | cPixel chose not to send, for example no consent or a test order | Pay for real, or untick Settings → Test orders |
| No browser page views | The app embed is off, and Home shows Enhanced tracking is off on your storefront | Turn it on; server sends carry on |
| Accepted in Live, nothing in TikTok after 2 hours | The events went to another dataset | Compare Pixel code with the Pixel ID in Datasets overview |
Remove, in Manage TikTok, stops sends to that account and deletes its token.
